Data-only plans
VWi-Fi or data connection
A small amount of data usage is required during eSIM installation.Turn off data roaming for the existing plan
To avoid double billing, please turn off data roaming in the data settings of your existing plan.
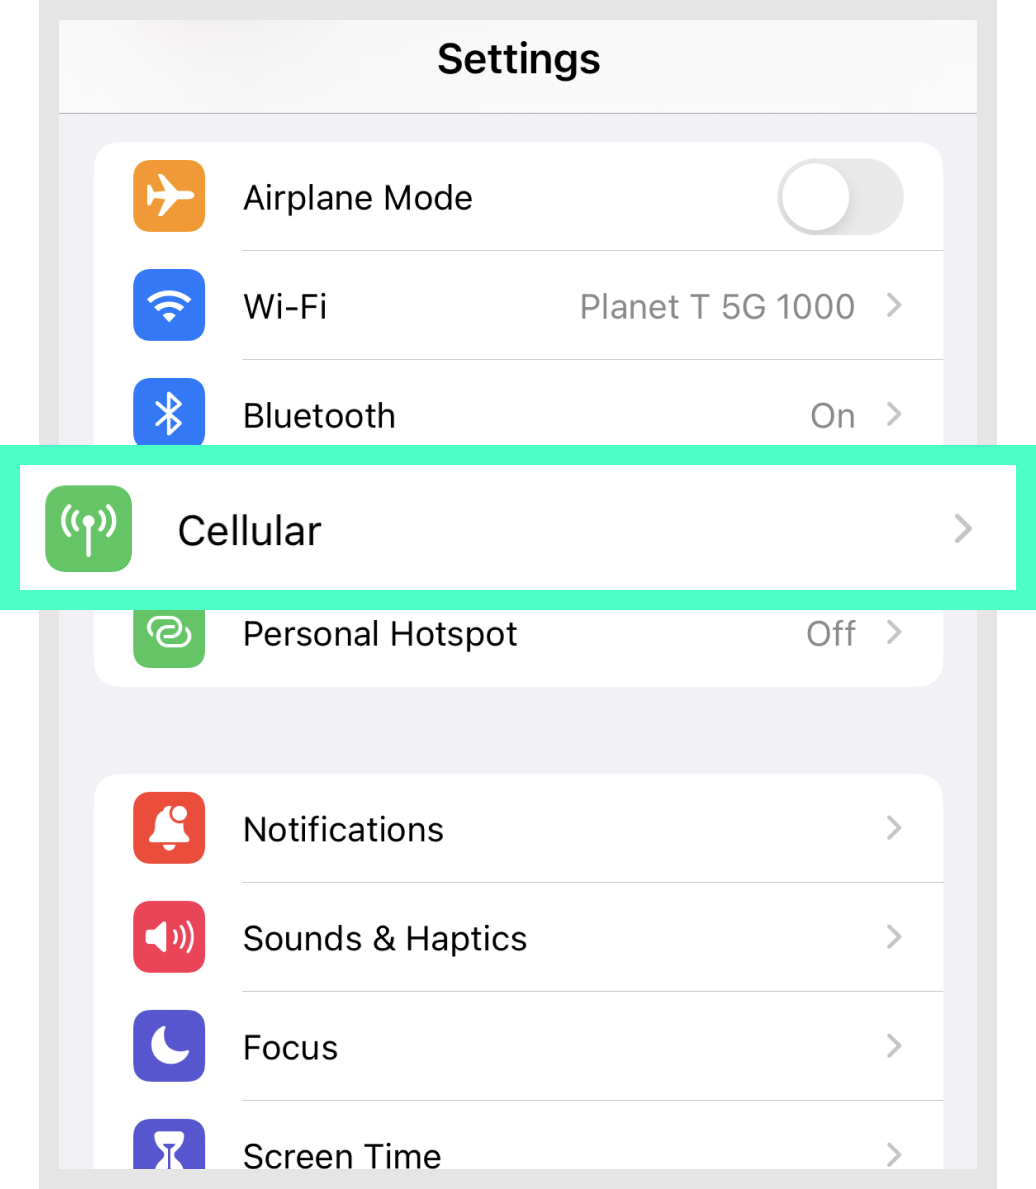
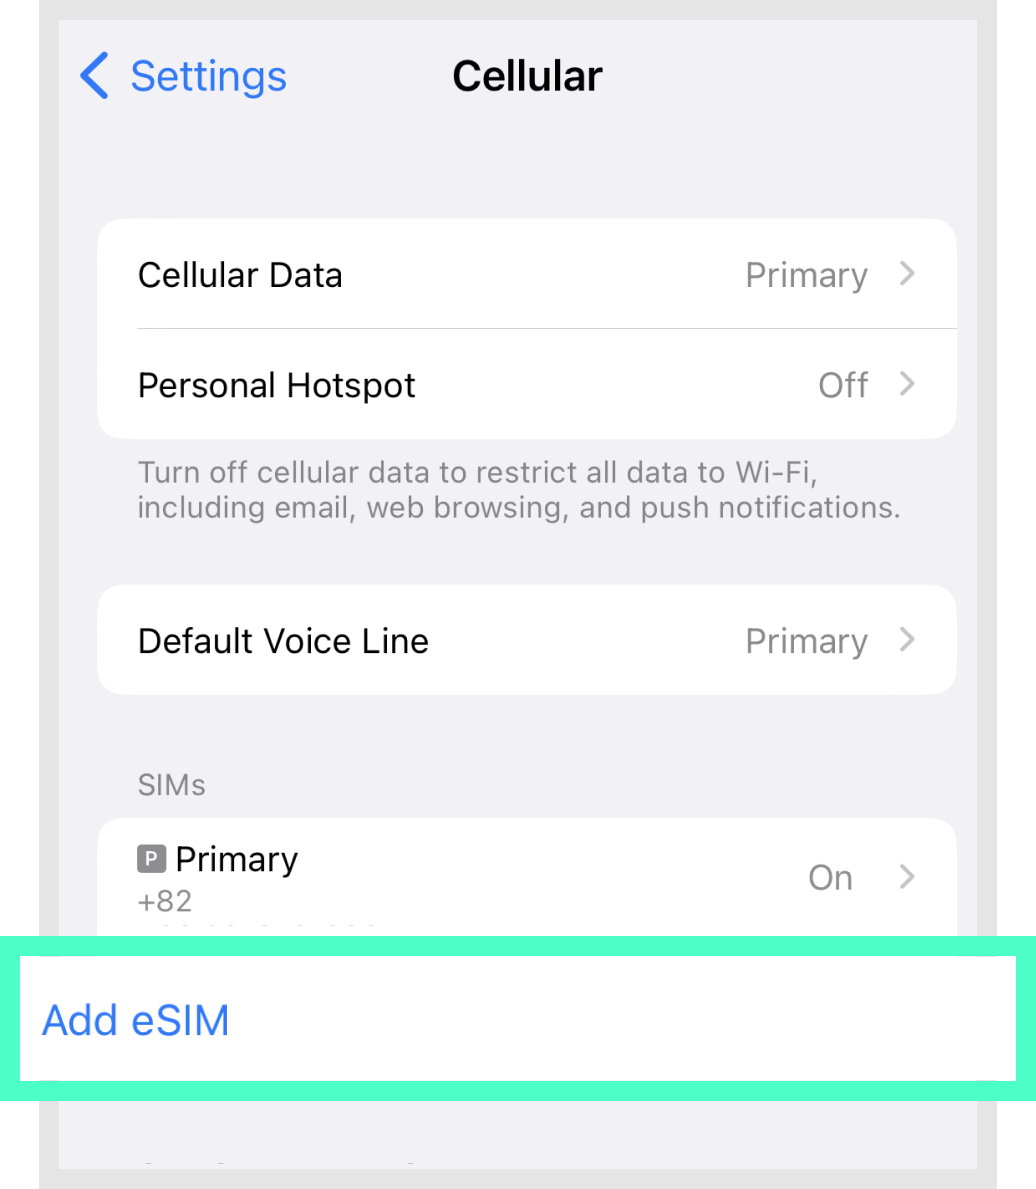
Settings > Cellular > Add eSIM
(or Add cellular plan)
> Use the QR code > Scan the QR code
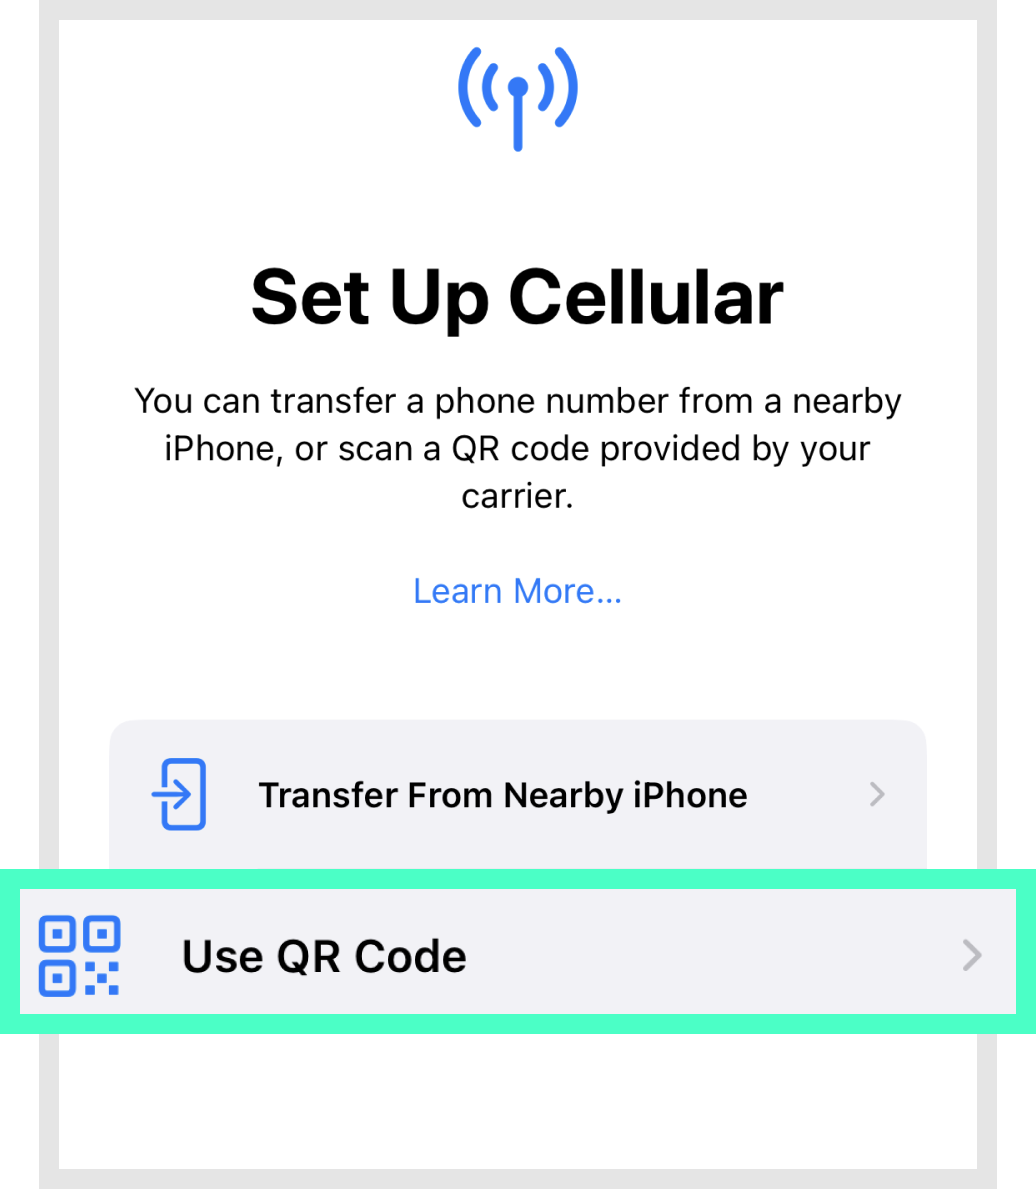
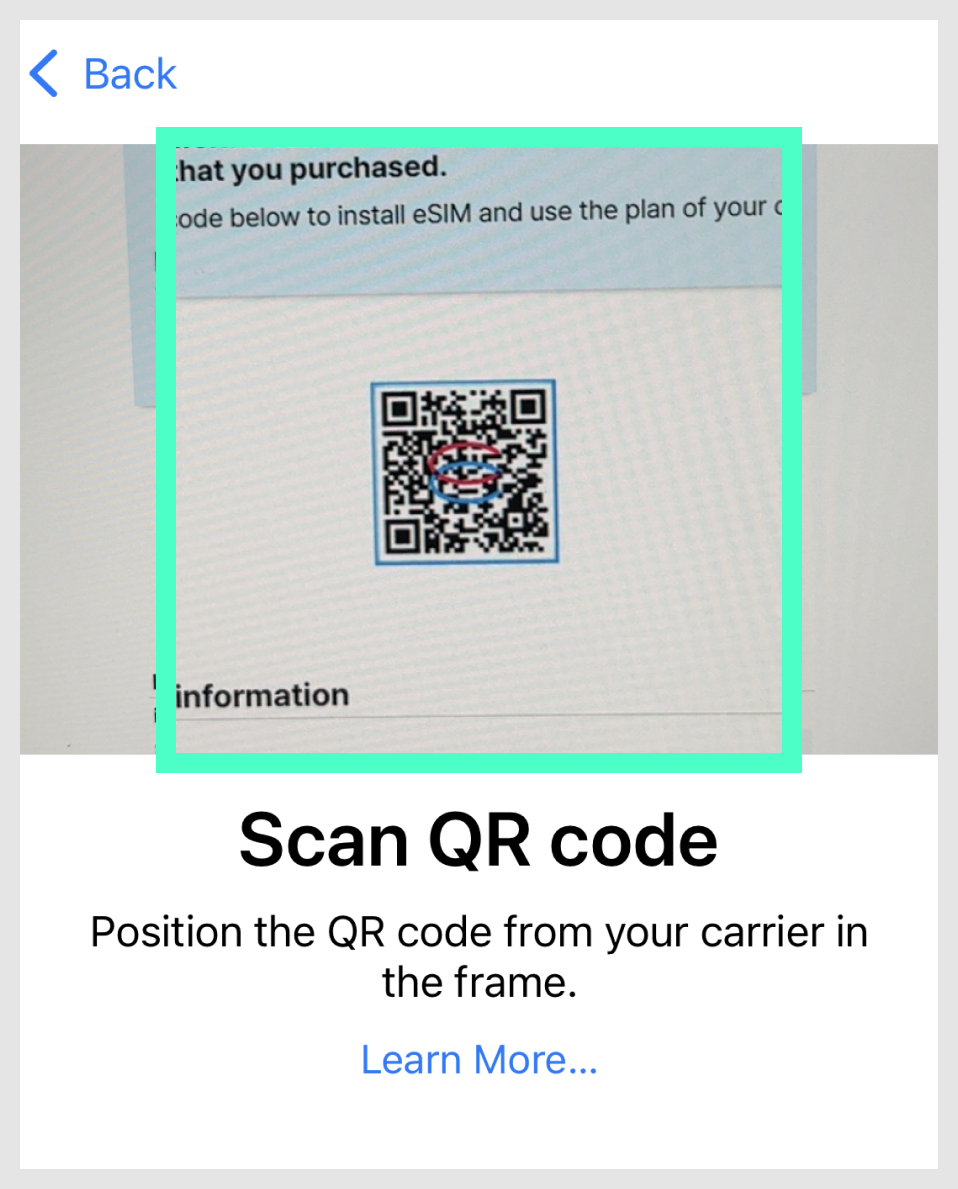
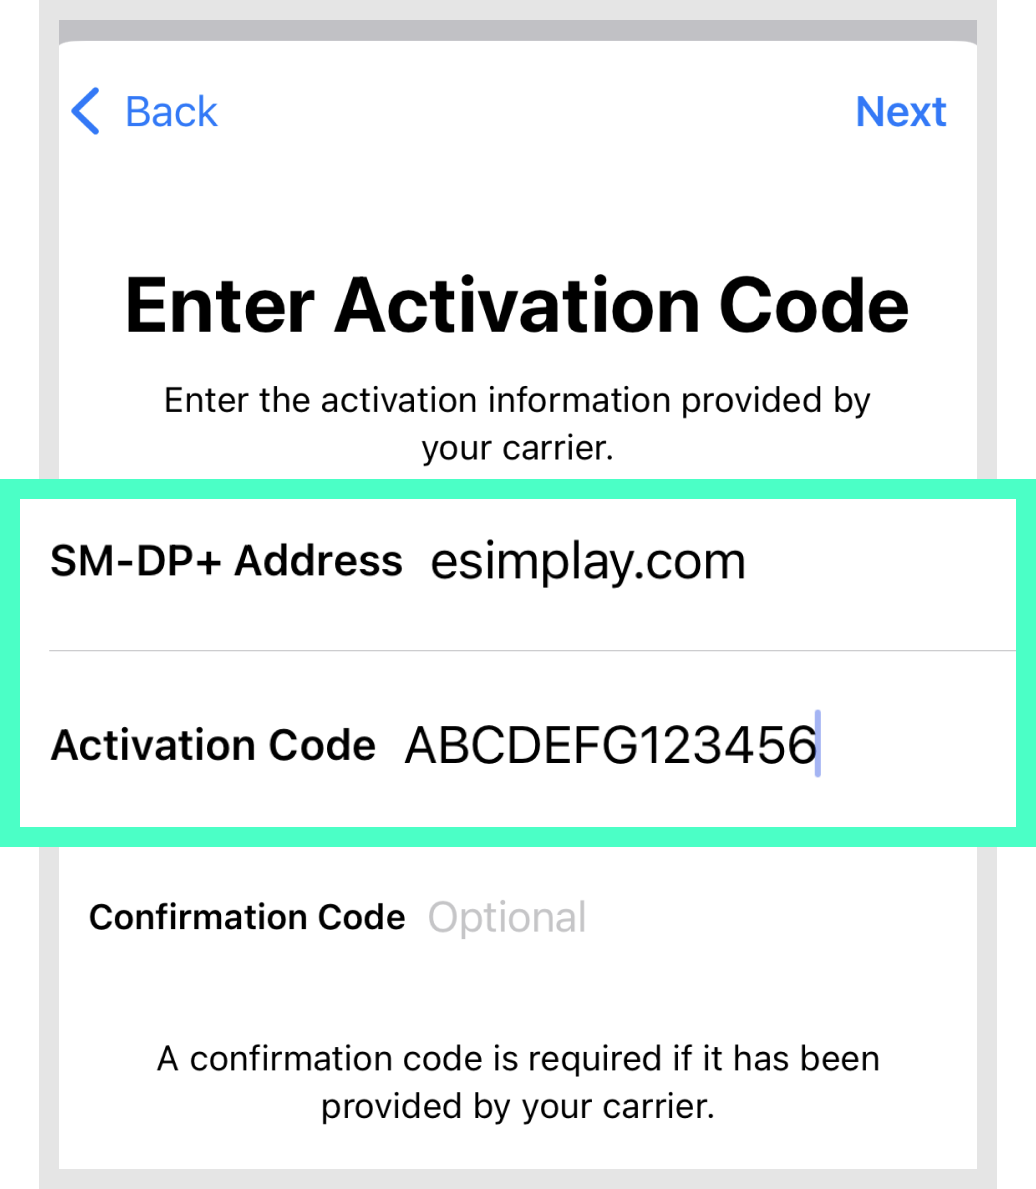
If you don't have a scanning device?
If you don't have a device to scan the QR code, you can enter the details manually by pressing [Enter Details Manually] at step 2, and then entering the [SM-DP+ Address] and [Activation Code] from your voucher.
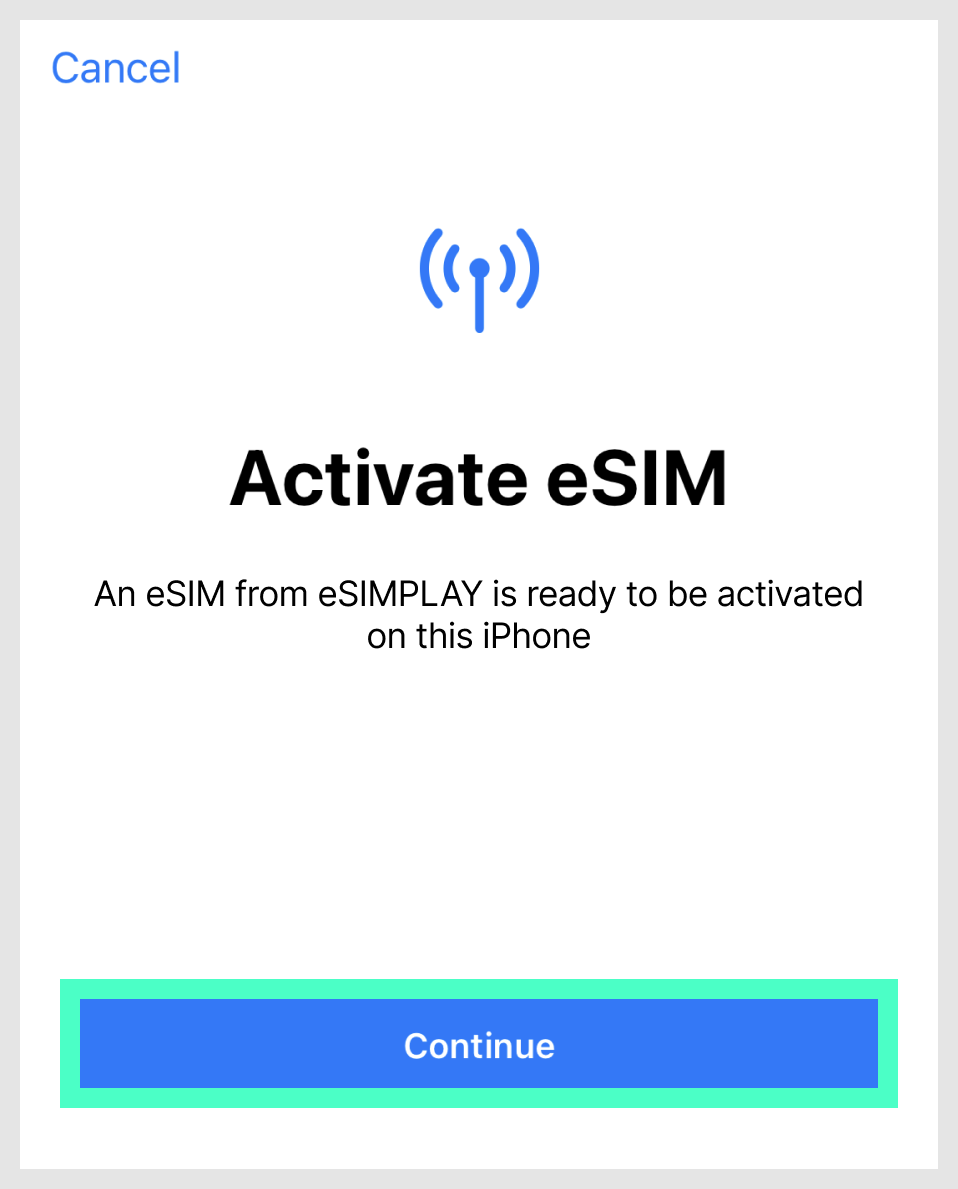
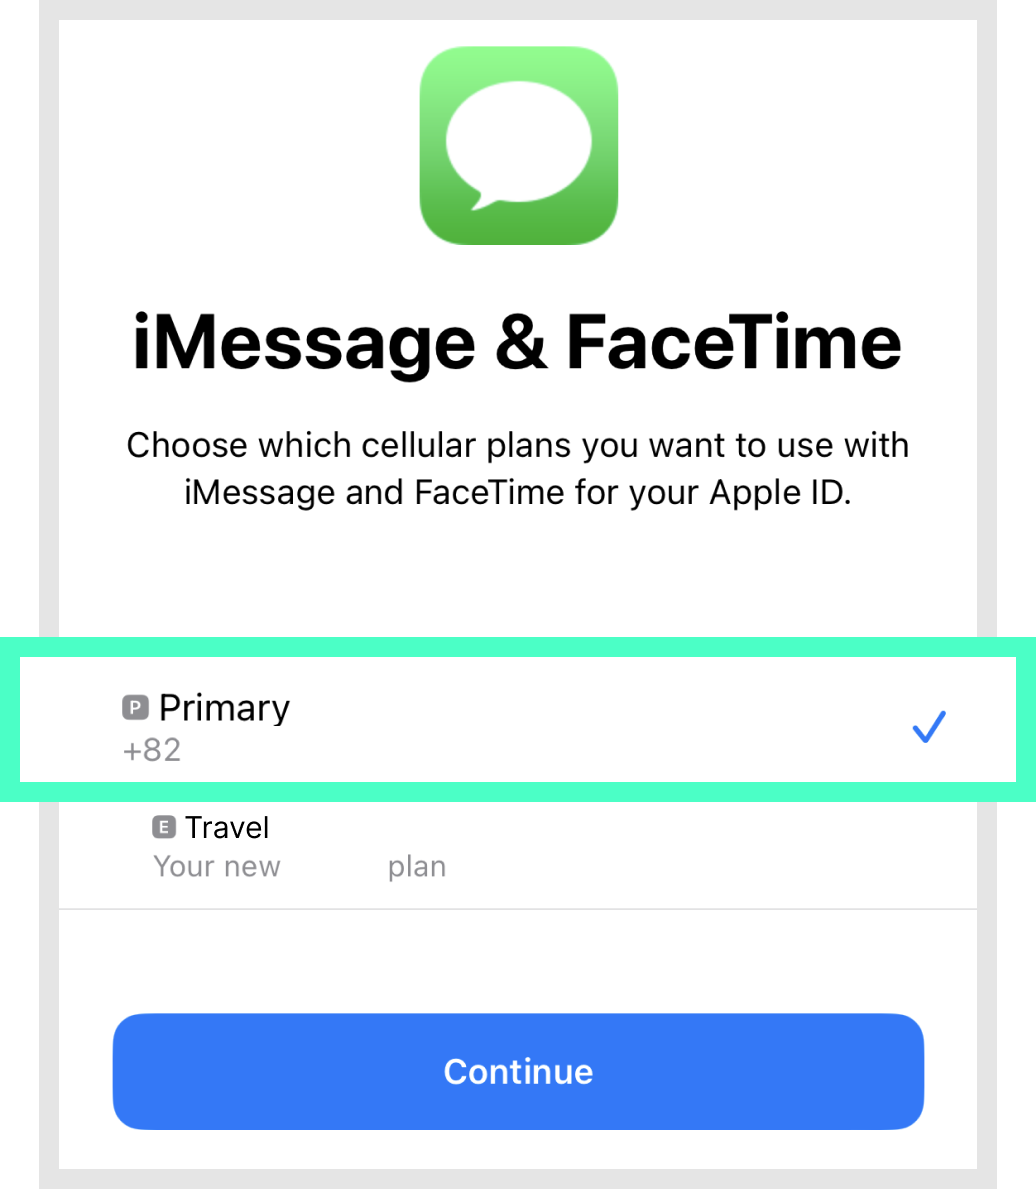
When the eSIM activation screen appears,
press the [Continue] button to register the eSIM.

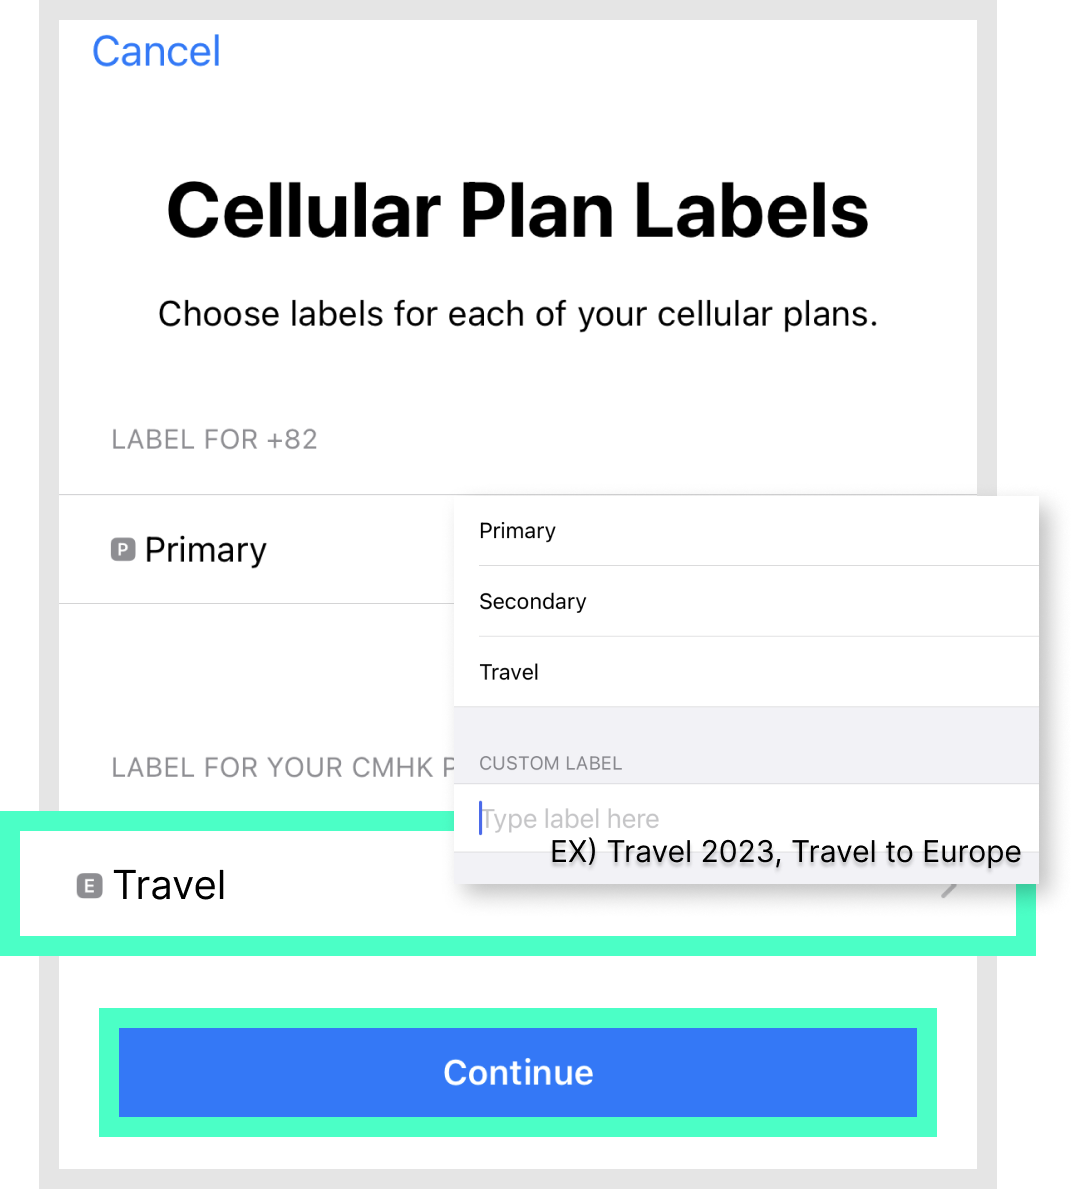
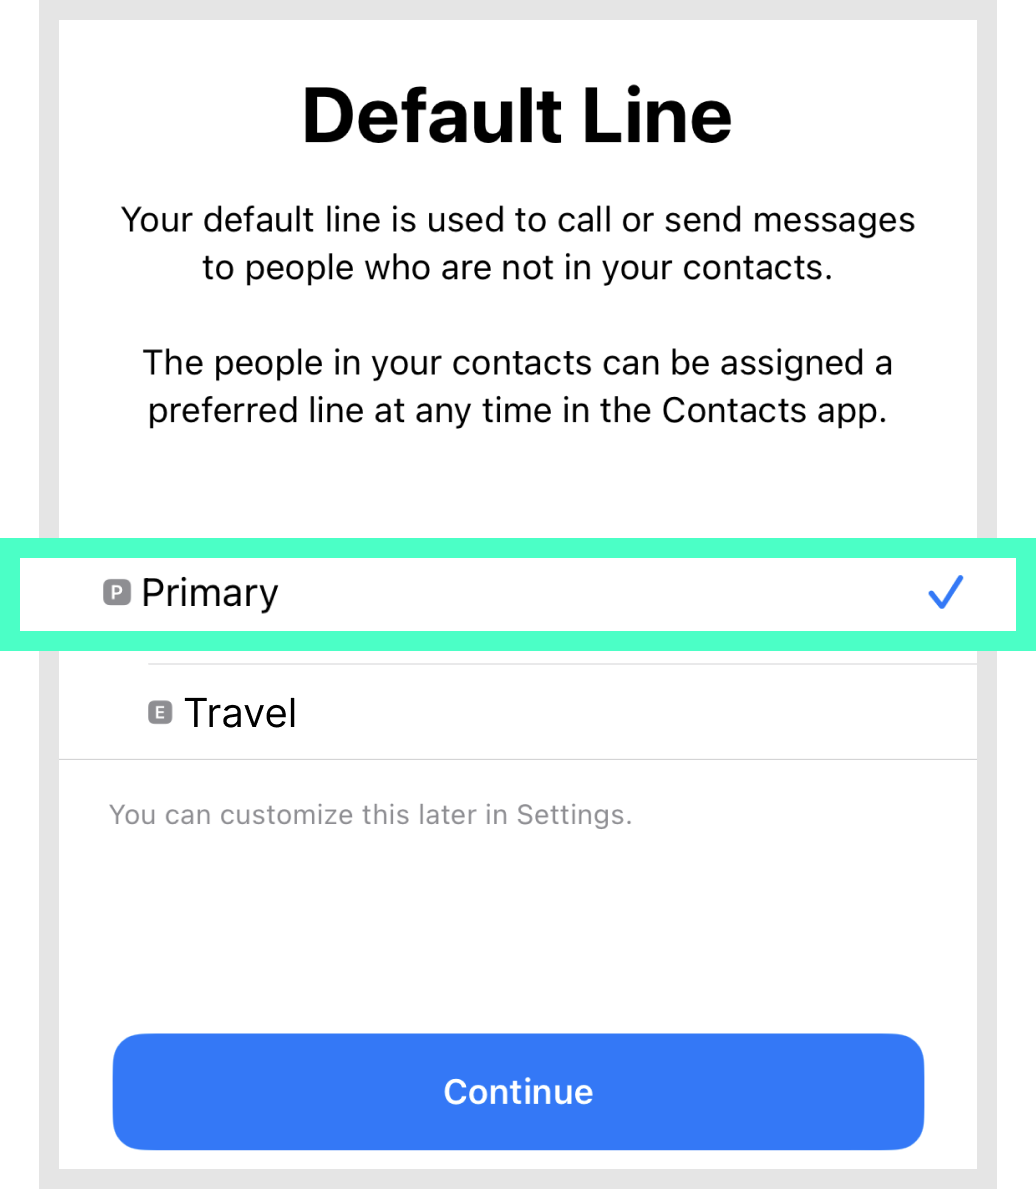
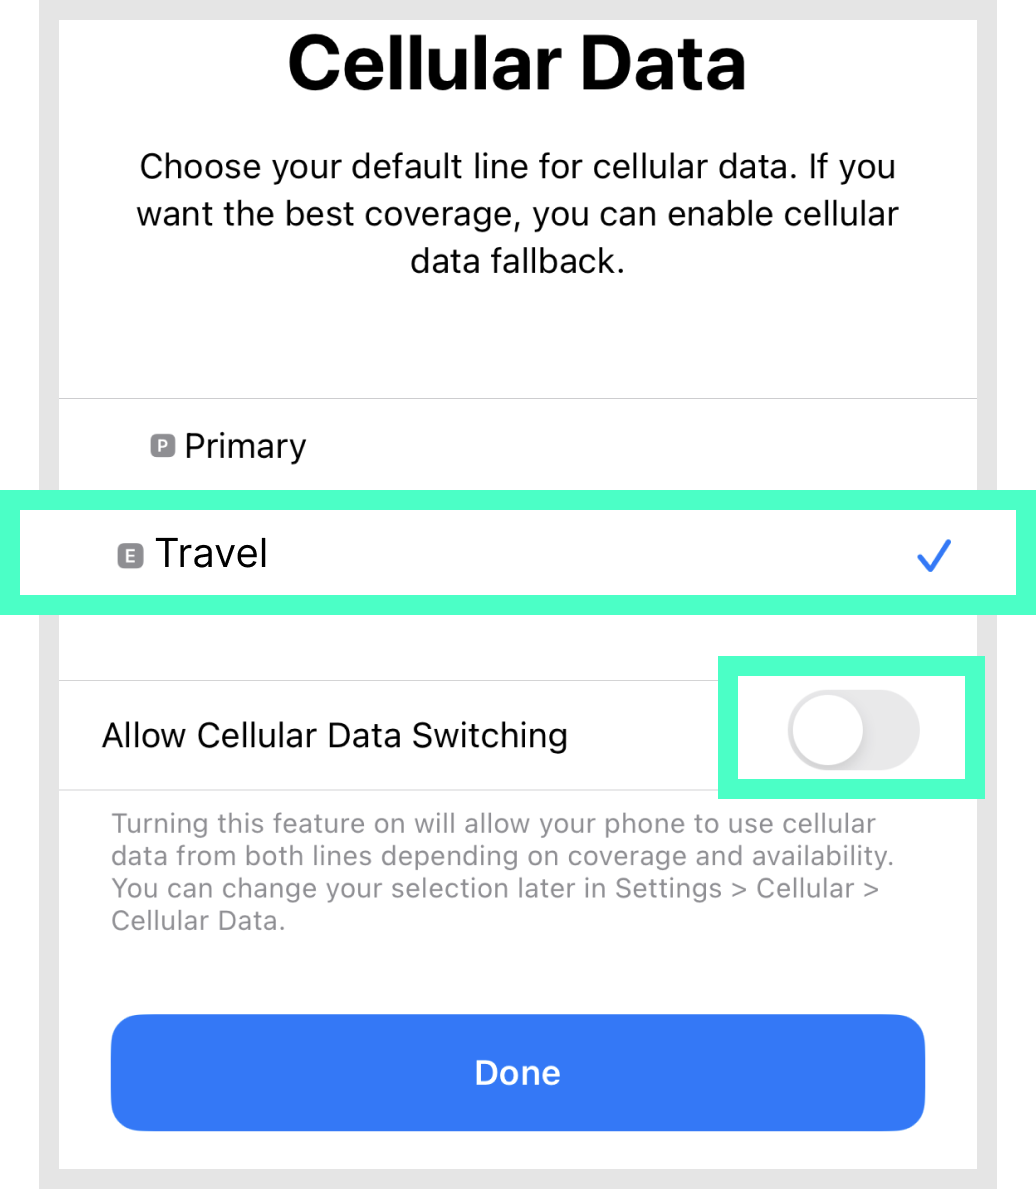
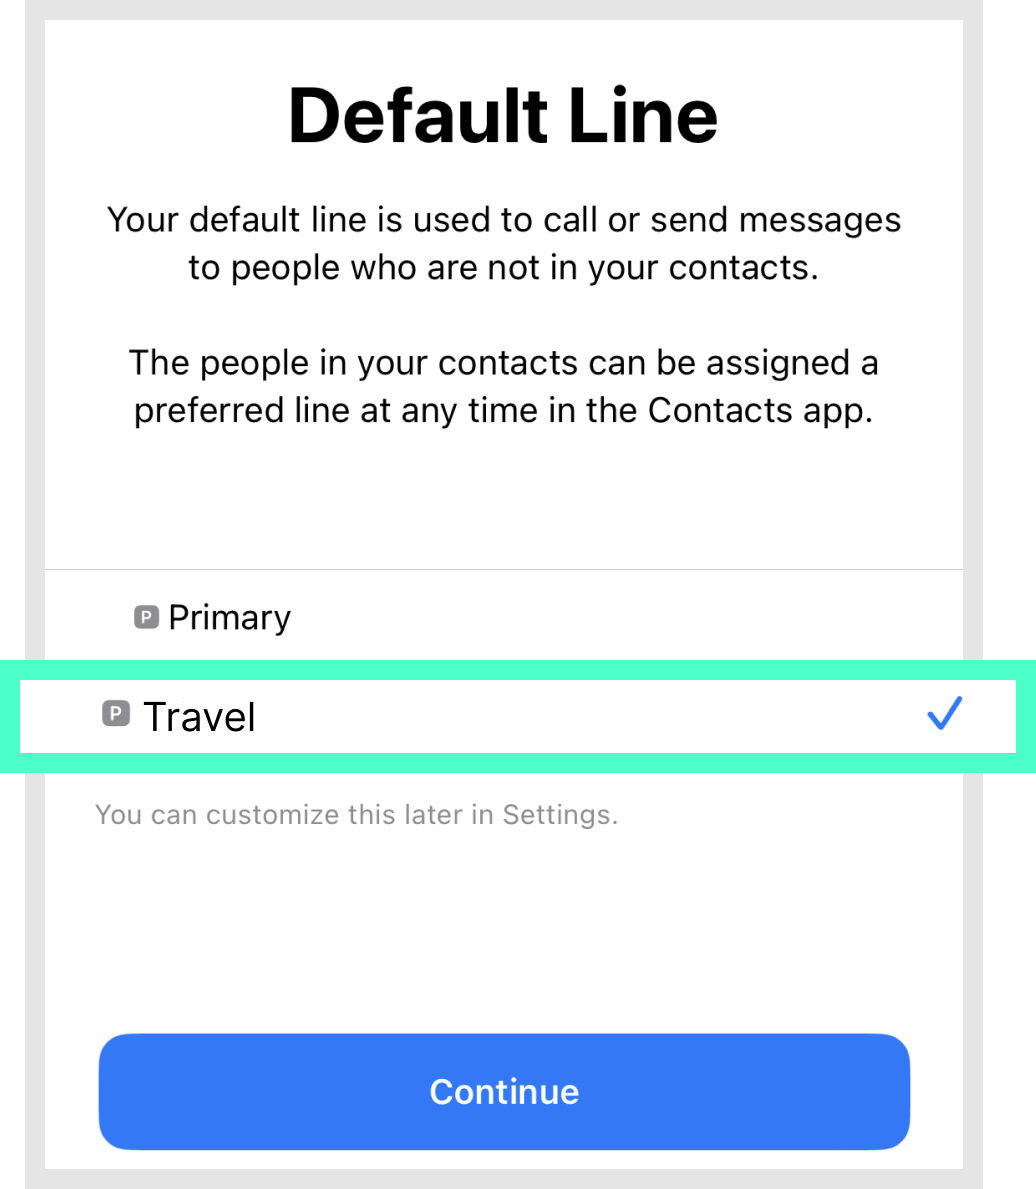
This is the step to set the plan name,
data, and phone line.
Please set it as shown in the image below.
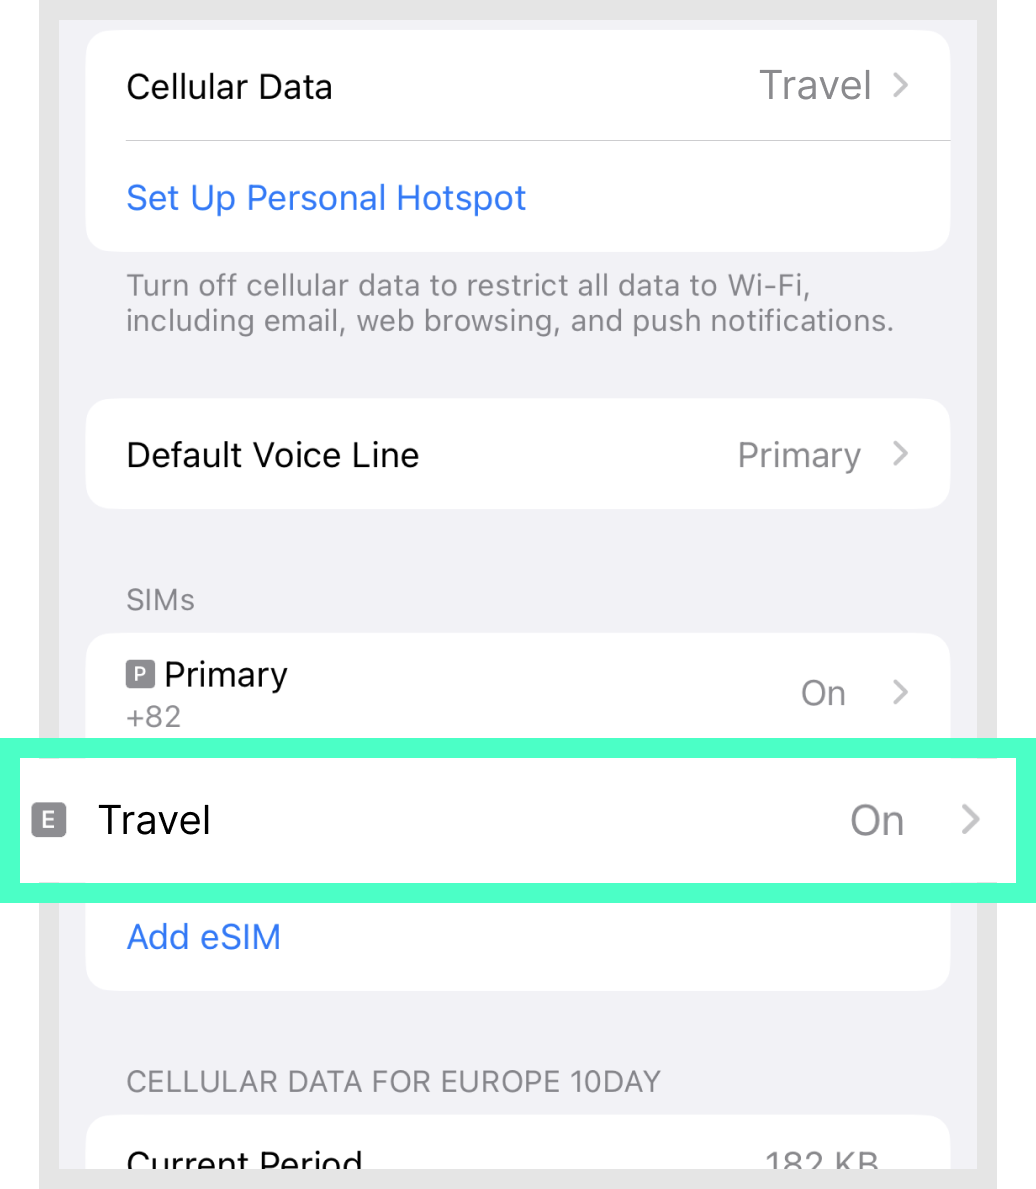
Cellular > After selecting the eSIM,
turn on data roaming.

Finally, please check that steps 1-4 are set as follows.
* Step 1: When the eSIM is properly connected to the network, it appears as two signal bars.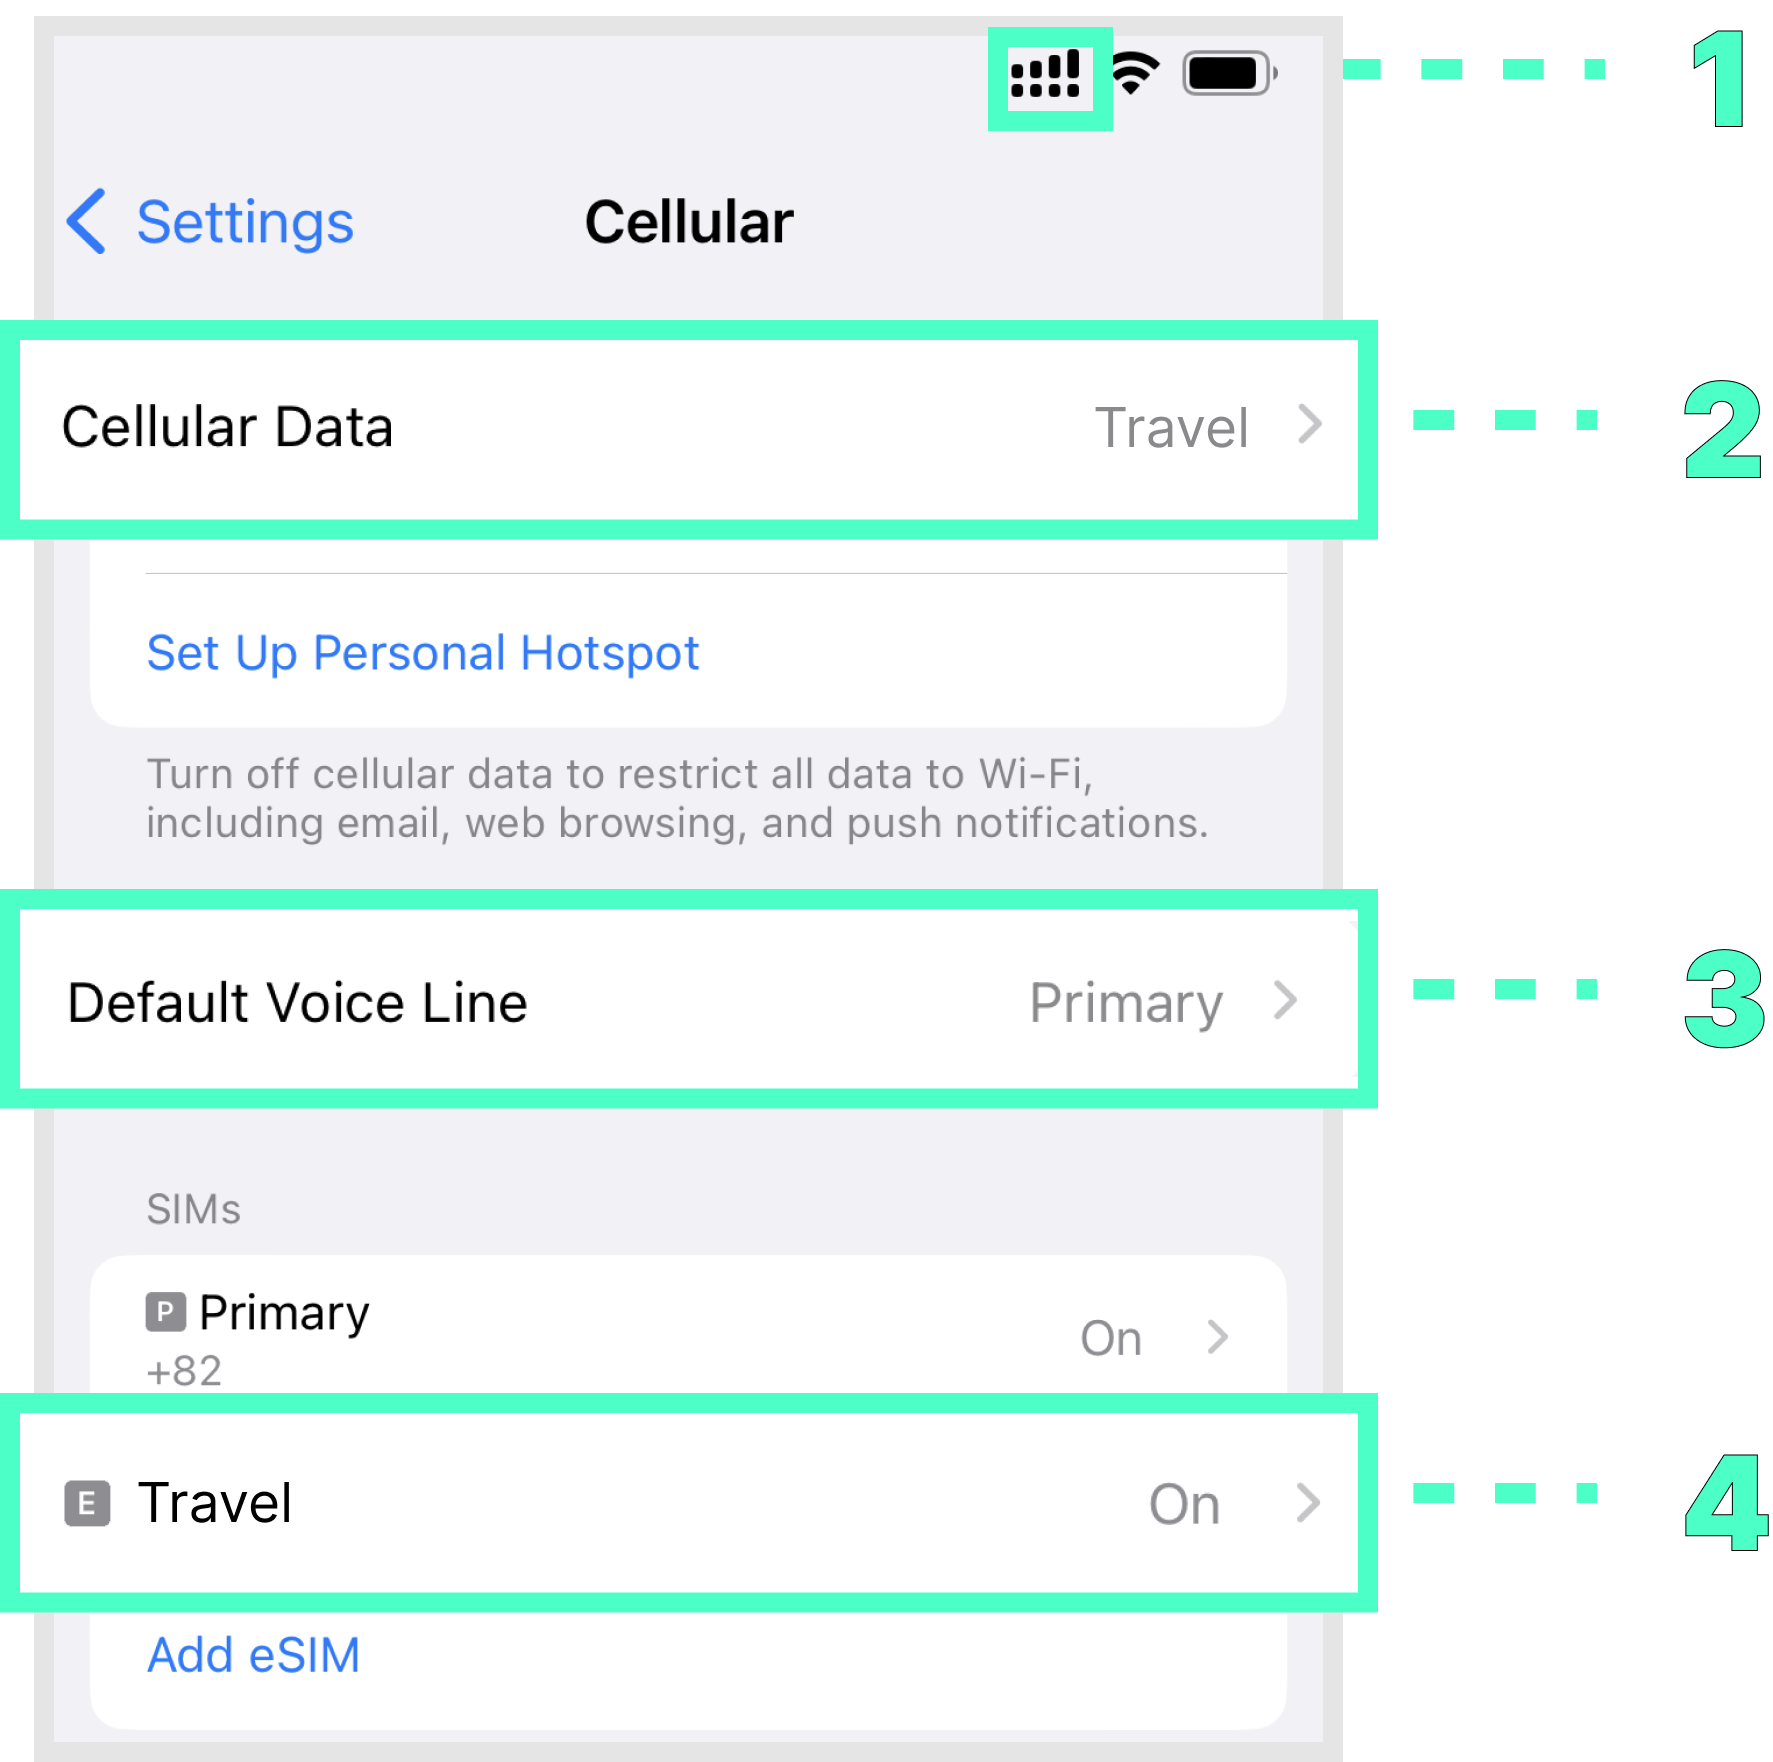
E-mail: cs@esimplay.com
Tel: +82-2-737-8282
(Mon-Fri 09:00~18:00, Lunch 12:00~13:00)Data + call/text plans
VWi-Fi or data connection
A small amount of data usage is required during eSIM installation.Turn off data roaming for the existing plan
To avoid double billing, please turn off data roaming in the data settings of your existing plan.1. How to check your phone number
Settings > Cellular > Select eSIM > Choose My phone number
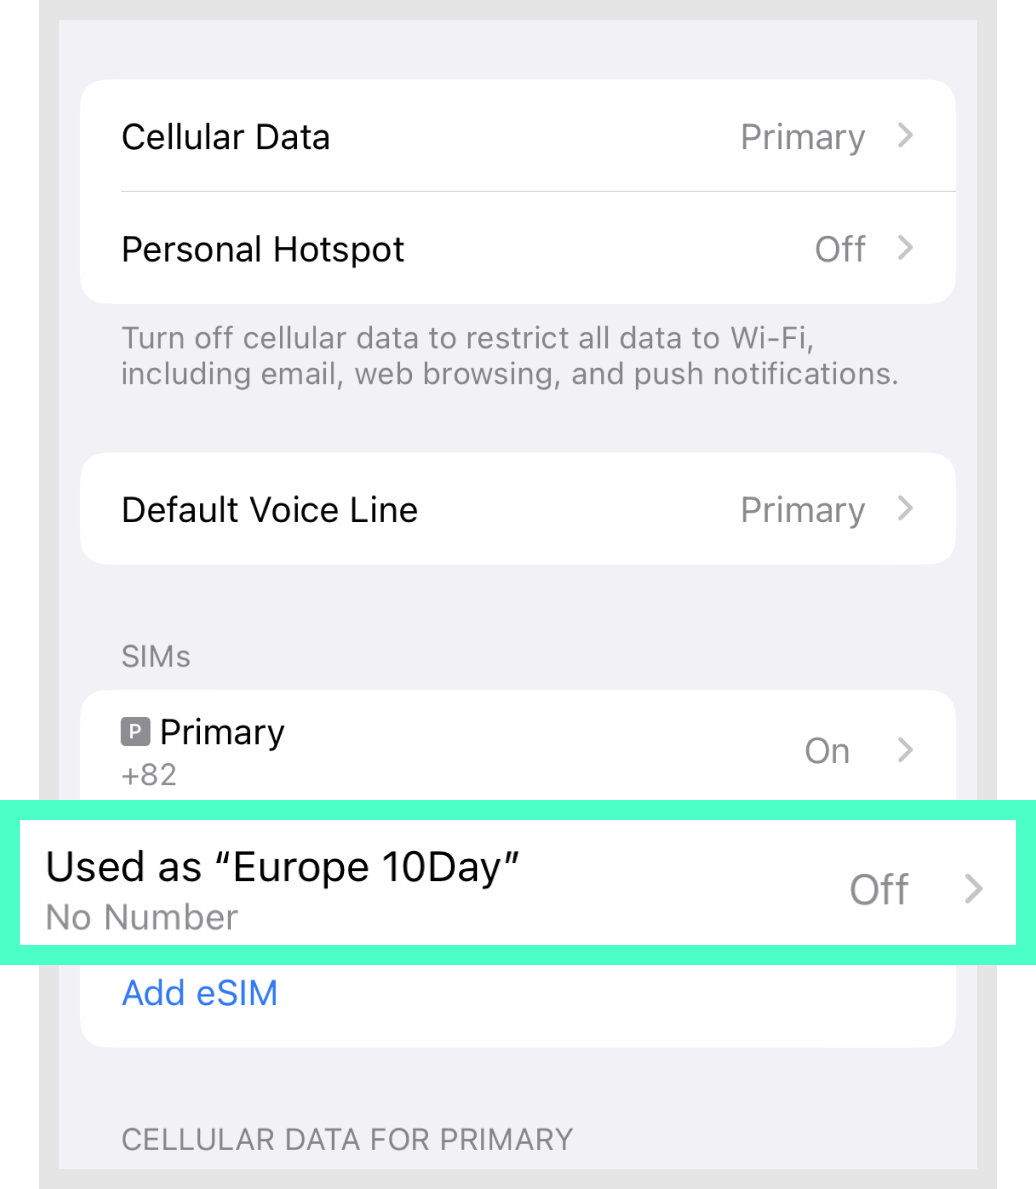 Select eSIM

2. How to check your phone line during a call
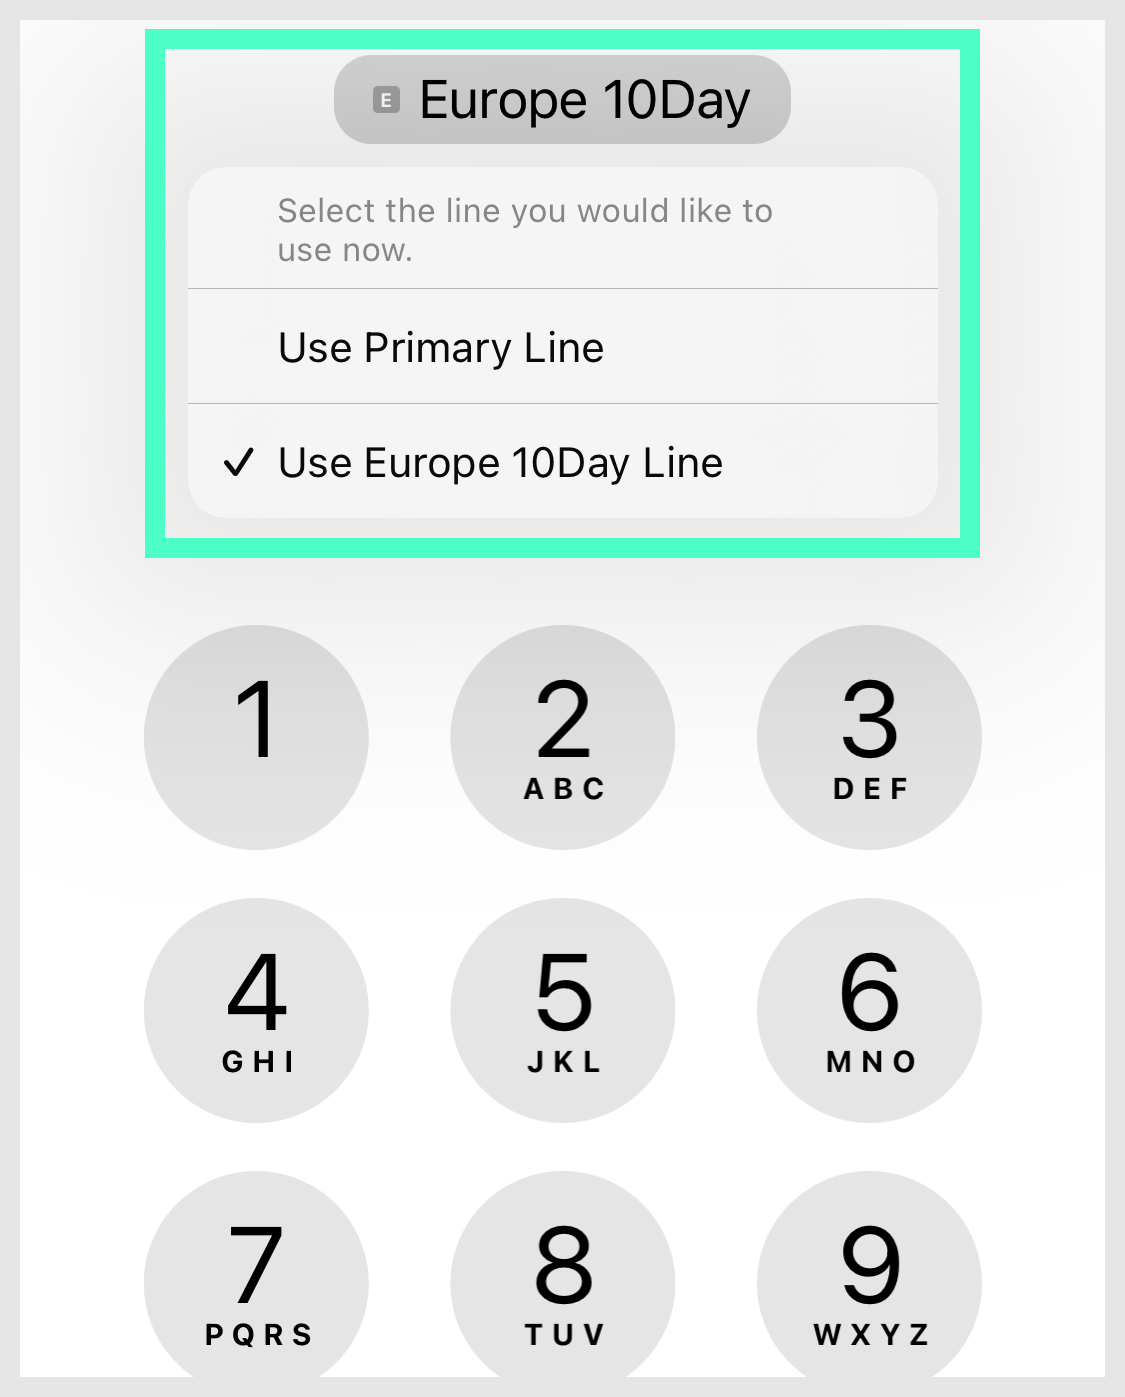
Check and change the line at the top of the phone (dial) screen
3. Precautions for local calls
Settings > Cellular > Add eSIM
(or Add cellular plan)
> Use the QR code > Scan the QR code
If you don't have a scanning device?
If you don't have a device to scan the QR code, you can enter the details manually by pressing [Enter Details Manually] at step 2, and then entering the [SM-DP+ Address] and [Activation Code] from your voucher.
When the eSIM activation screen appears,
press the [Continue] button to register the eSIM.
This is the step to set the plan name,
data, and phone line.
Please set it as shown in the image below.
Cellular > After selecting the eSIM,
turn on data roaming.
Finally, please check that steps 1-4 are set as follows.
* Step 1: When the eSIM is properly connected to the network, it appears as two signal bars.
E-mail: cs@esimplay.com
Tel: +82-2-737-8282
(Mon-Fri 09:00~18:00, Lunch 12:00~13:00)Data-only plans
VWi-Fi or data connection
A small amount of data usage is required during eSIM installation.Turn off data roaming for the existing plan
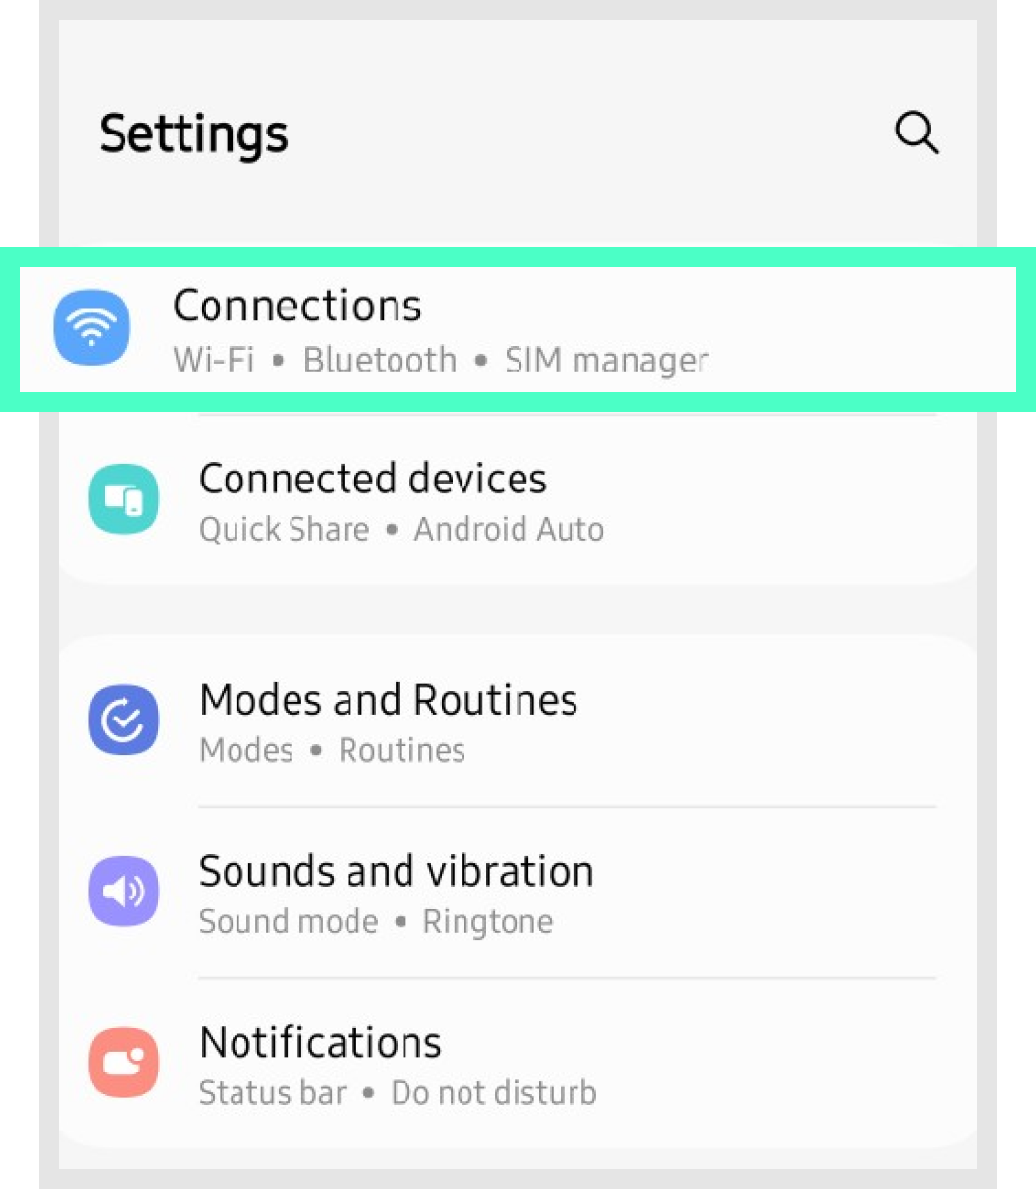
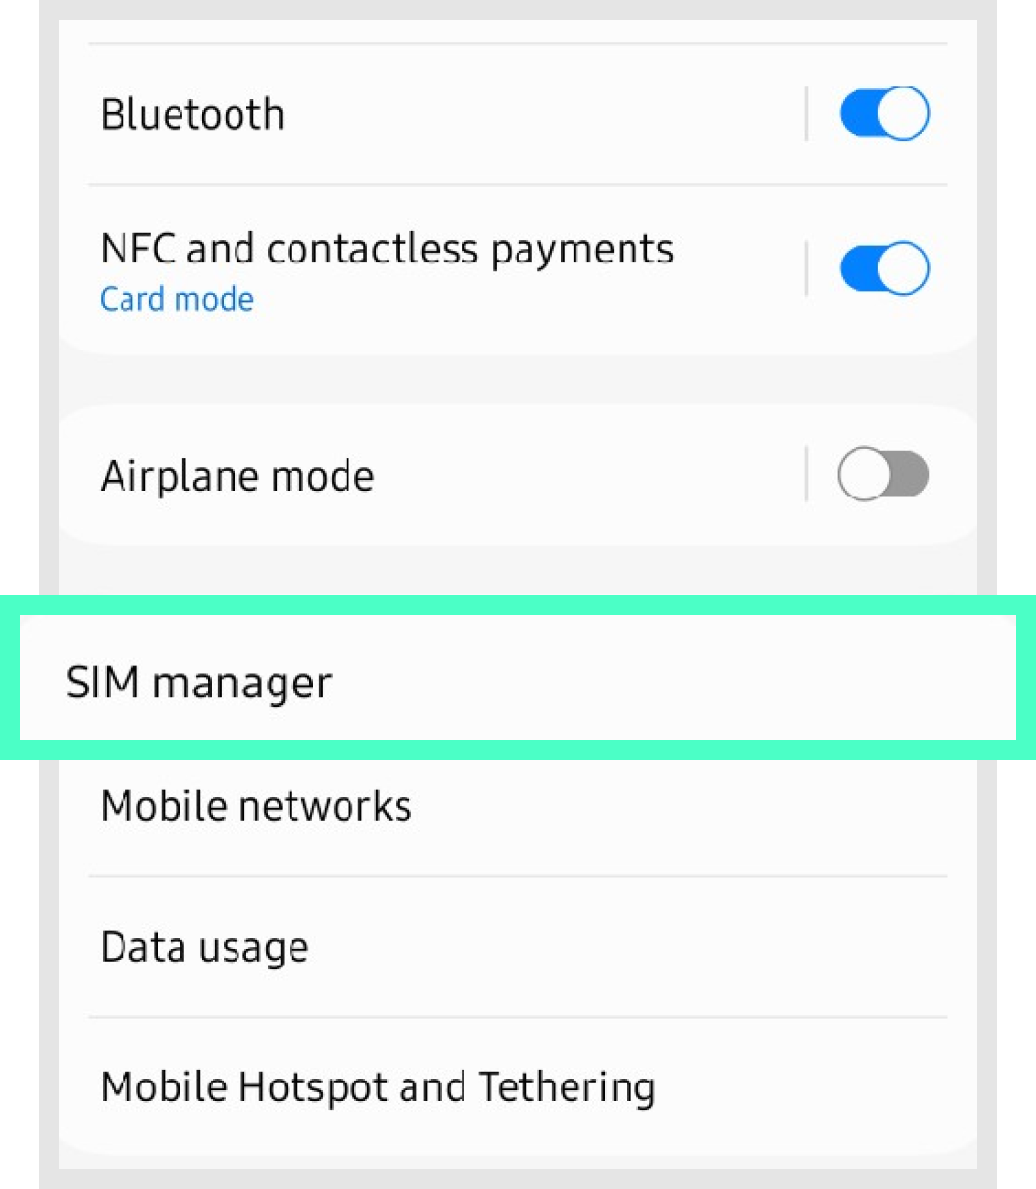
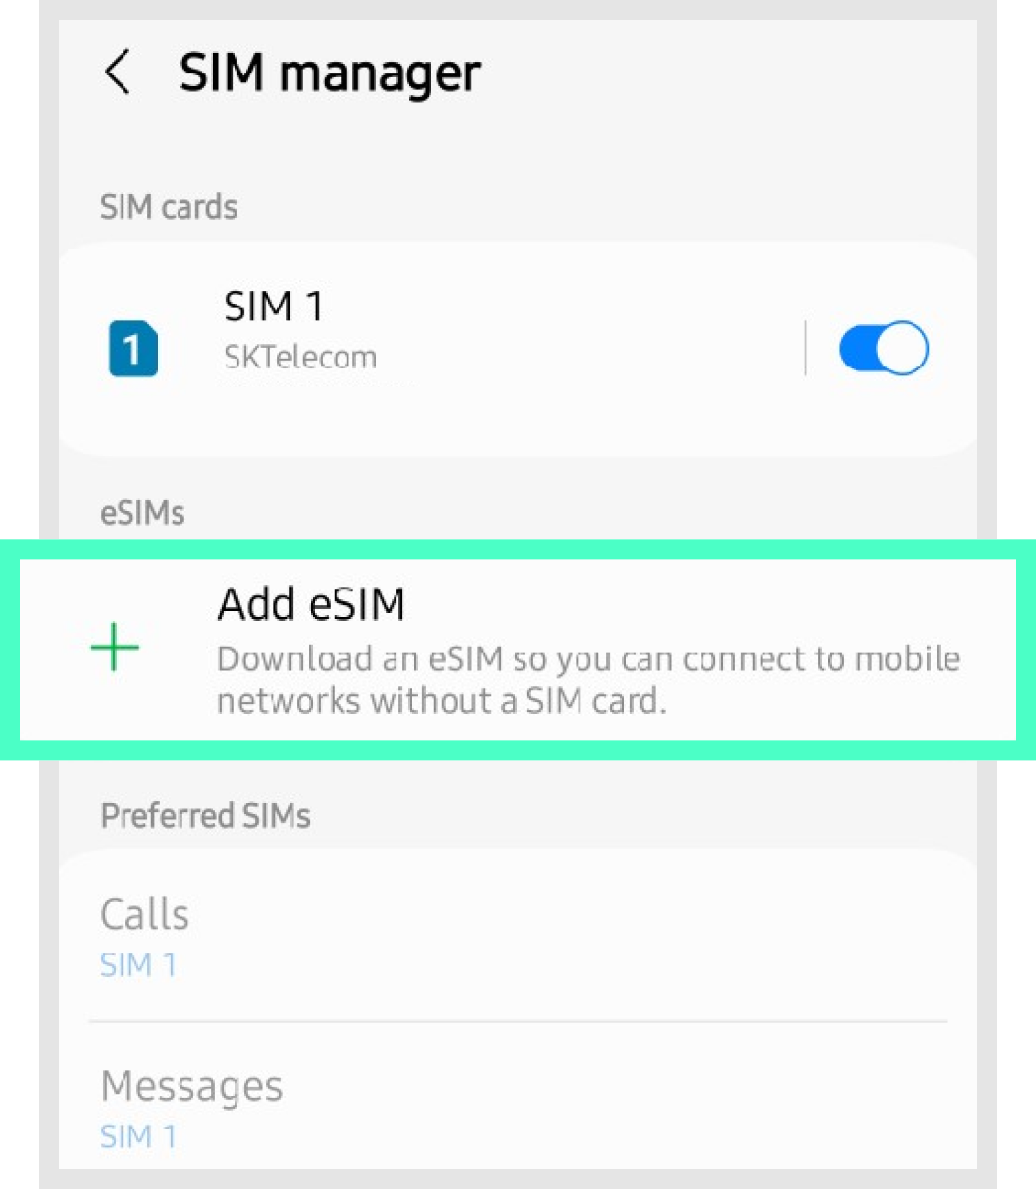
To avoid double billing, please turn off data roaming in the data settings of your existing plan.Settings > Connect > SIM card manager
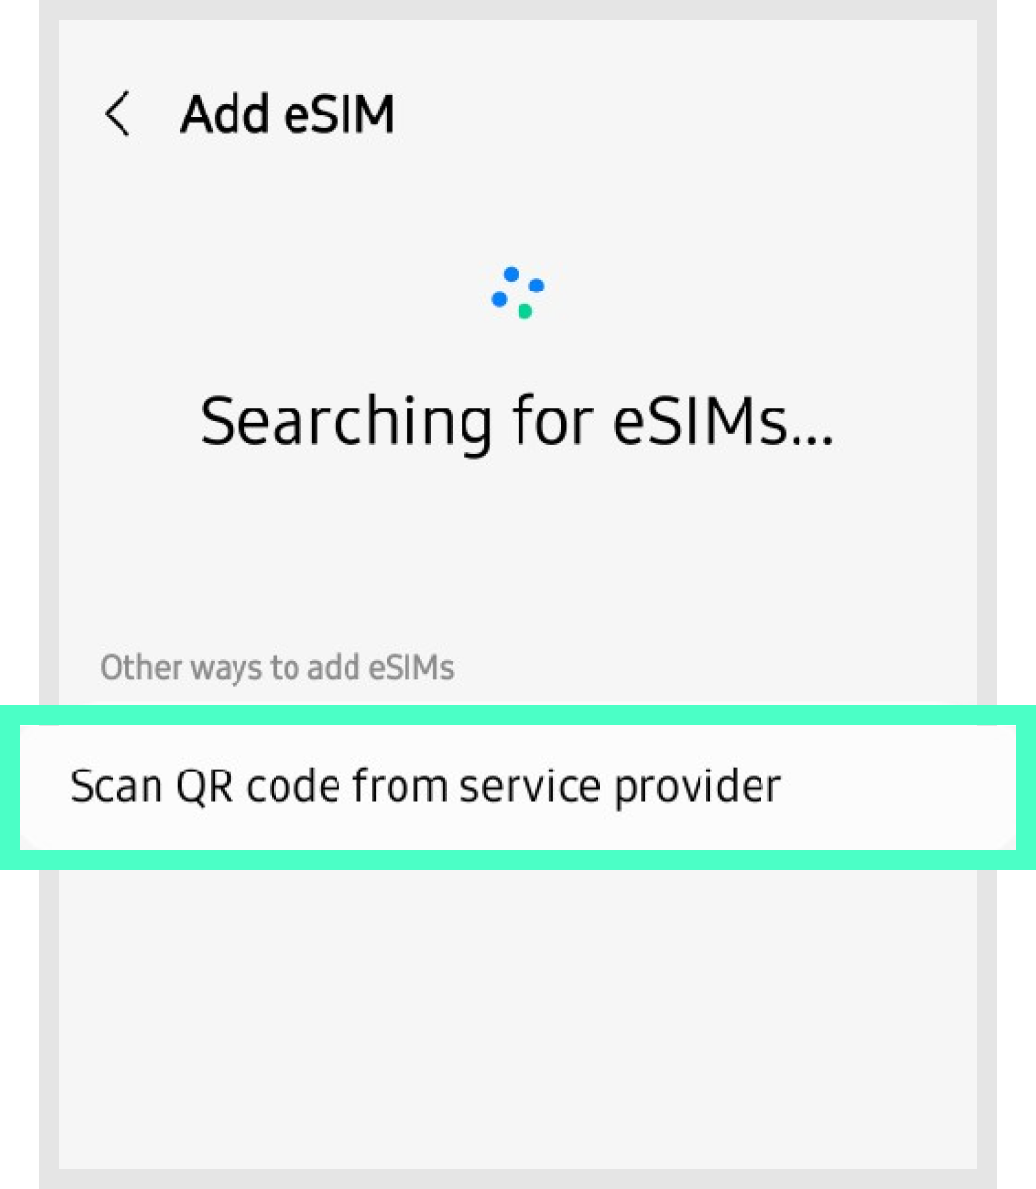
> Add mobile plan > Scan carrier QR code
> Gallery > Select eSIM voucher

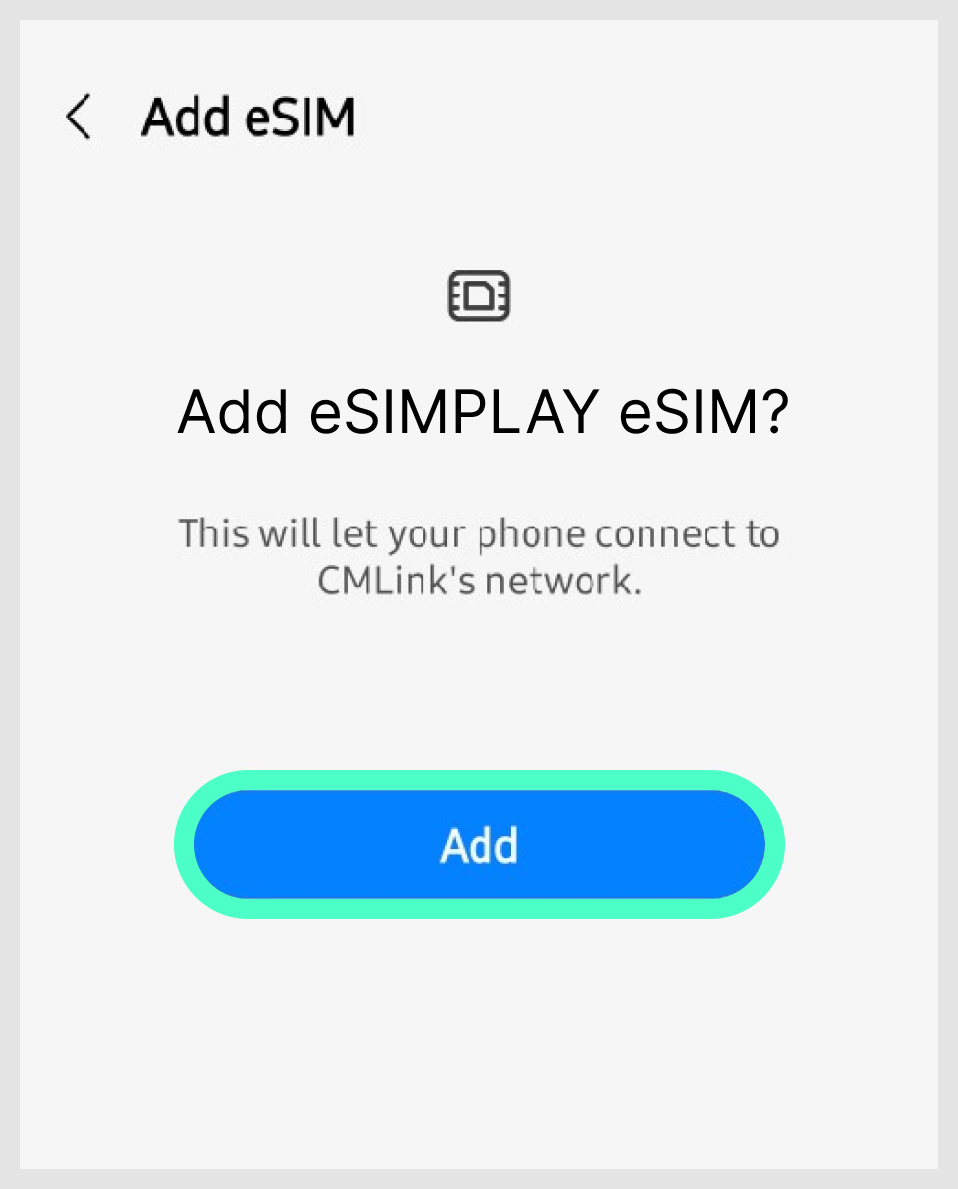
If [Add mobile plan to your phone] appears, press the [Confirm] button.
* During the process of adding a rate plan,
please be careful not to switch to another screen or delete it, as the rate plan may [not be registered properly].

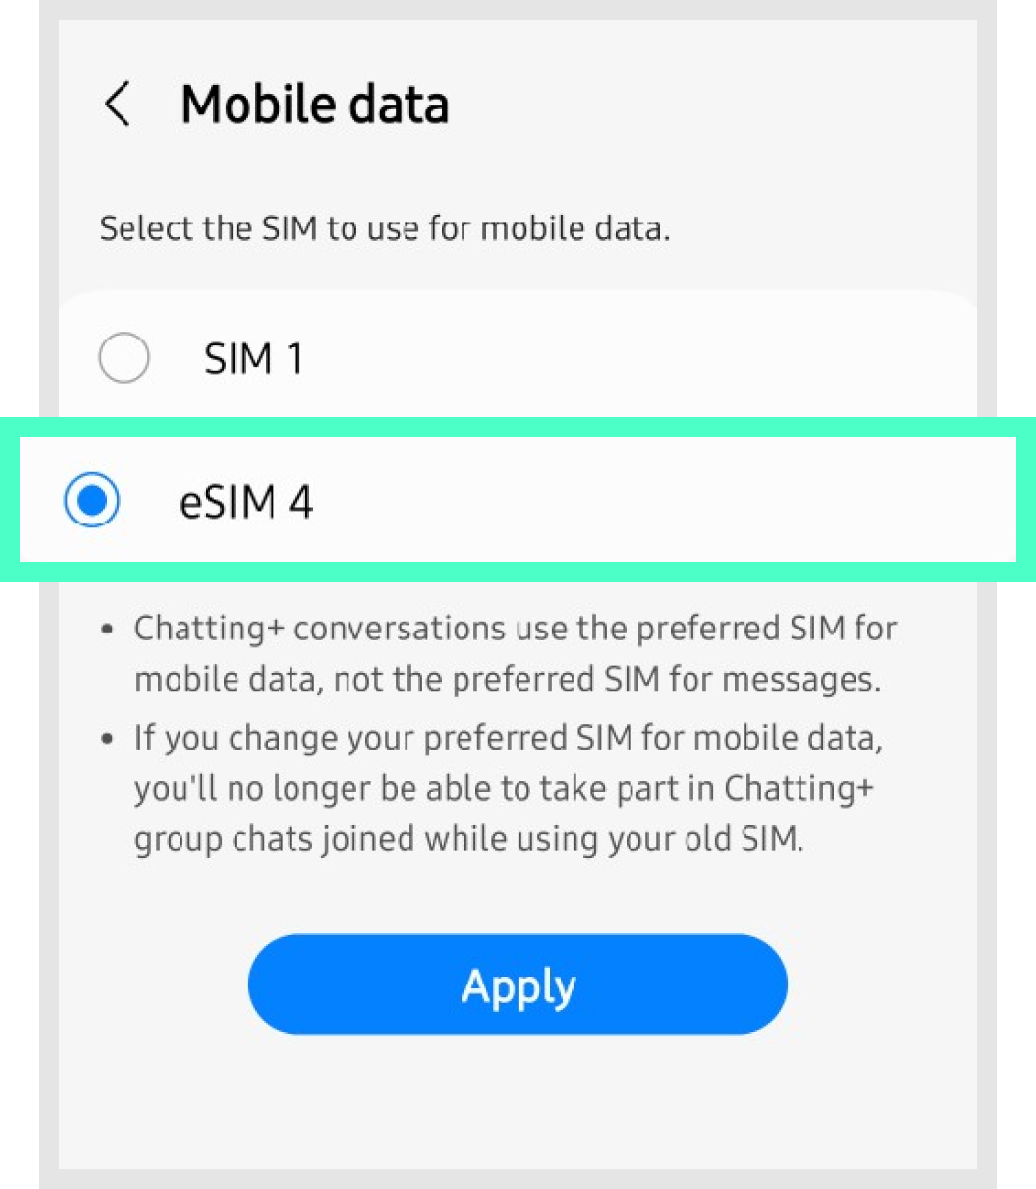
Select [Mobile data] to specify the eSIM rate plan to use.

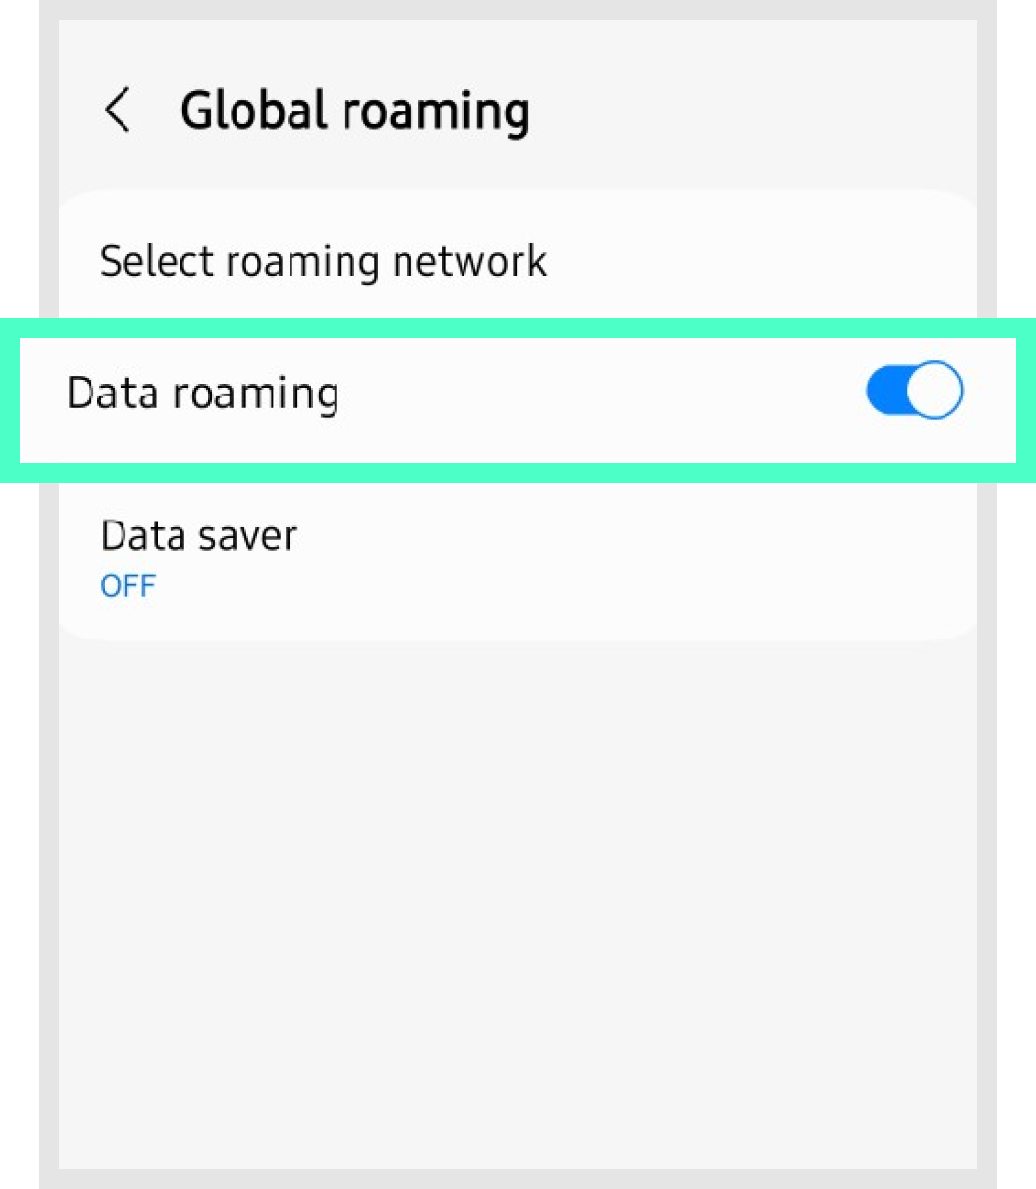
Go back > Connect > Change [data roaming] to ON when roaming overseas.
*However, for [Local eSIM], roaming does not need to be turned on in that area. (Local eSIM is indicated by [Local] in the product name.)
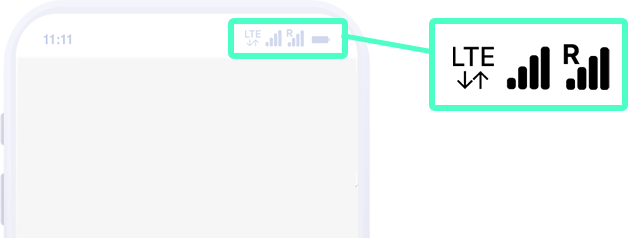
Finally,
check that two signal bars are connected to the top of the communication antenna(signal) as shown.
E-mail: cs@esimplay.com
Tel: +82-2-737-8282
(Mon-Fri 09:00~18:00, Lunch 12:00~13:00)Data + call/text plans
VWi-Fi or data connection
A small amount of data usage is required during eSIM installation.Turn off data roaming for the existing plan
To avoid double billing, please turn off data roaming in the data settings of your existing plan.1. How to check your phone number
Settings > Mobile Phone Information > Phone number

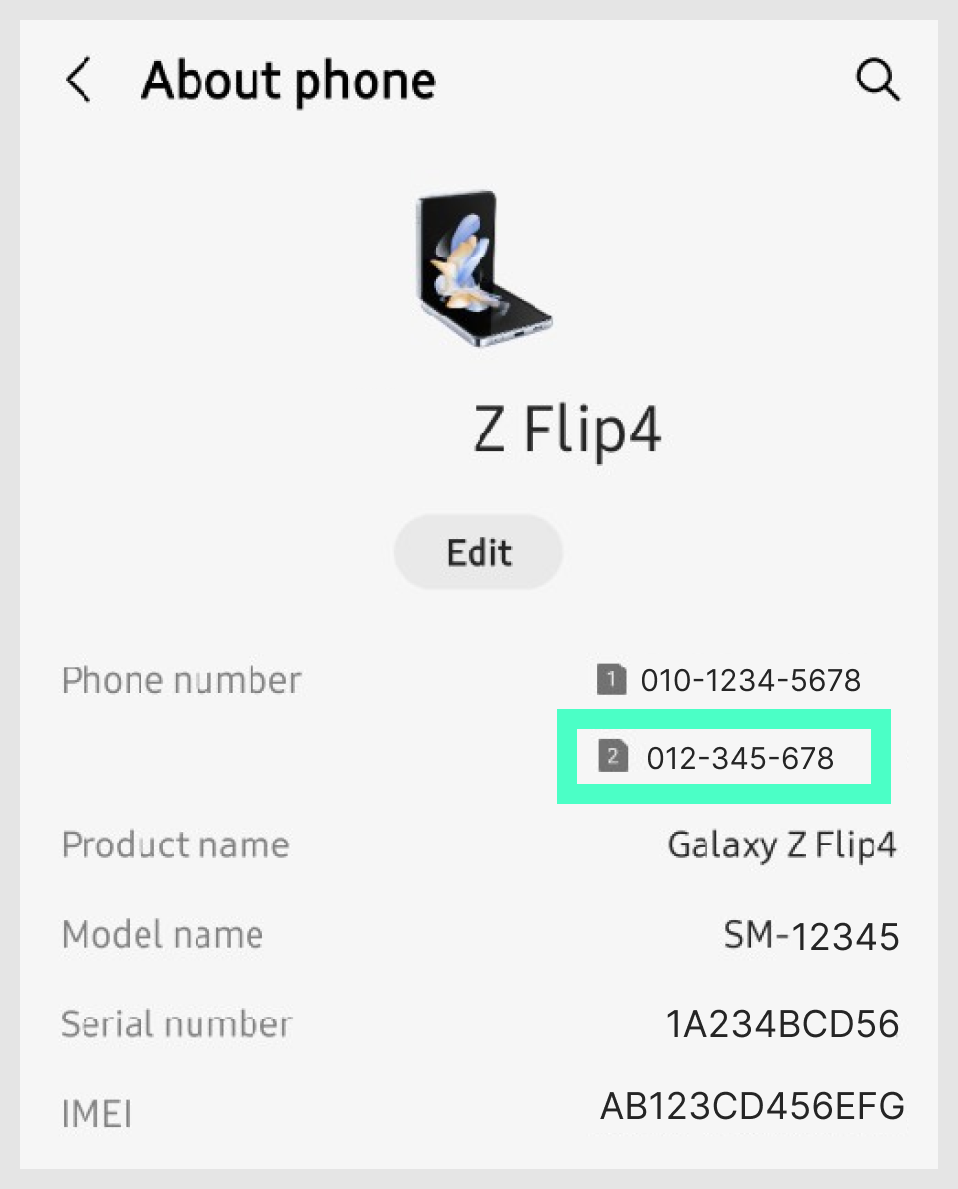 eSIM phone number →
2. How to check your phone line during a call

- You can check and change the line at the bottom of the phone (dial) screen
3. Precautions for local calls
Settings > Connect > SIM card manager
> Add mobile plan > Scan carrier QR code
> Gallery > Select eSIM voucher
If [Add mobile plan to your phone] appears, press the [Confirm] button.
* During the process of adding a rate plan,
please be careful not to switch to another screen or delete it, as the rate plan may [not be registered properly].
Select [Call/Message/Mobile Data] and set it as your eSIM plan to use.
Go back > Connect > Change [data roaming] to ON when roaming overseas.
*However, for [Local eSIM], roaming does not need to be turned on in that area. (Local eSIM is indicated by [Local] in the product name.)
Finally,
check that two signal bars are connected to the top of the communication antenna(signal) as shown.
E-mail: cs@esimplay.com
Tel: +82-2-737-8282
(Mon-Fri 09:00~18:00, Lunch 12:00~13:00)


